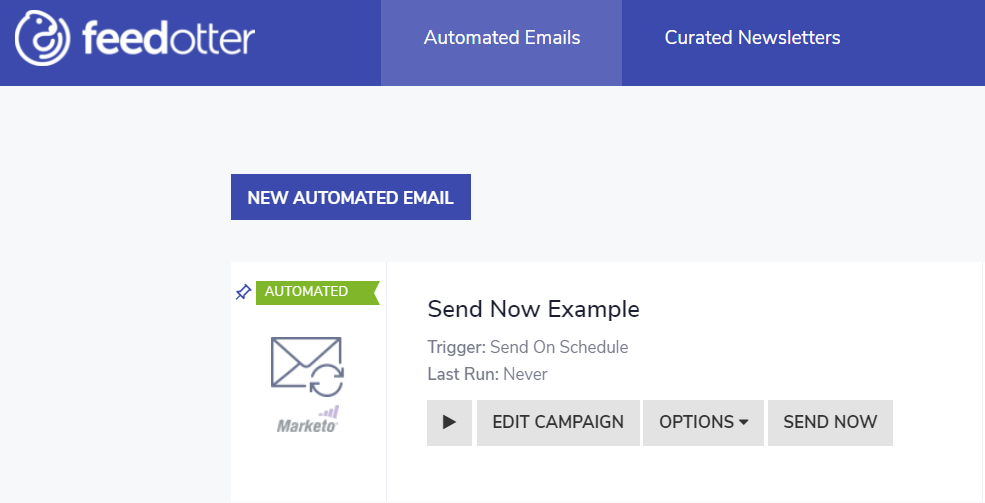
# Send Now
All automated email campaigns have a Send Now feature that is accessible from a button on the dashboard card. The Send Now feature provides an interface allowing you to immediately trigger your automated email campaign. This means your email will be created or scheduled/sent based on your campaign's setup.
A few reasons why customers use Send Now:
* To test an automated campaign
* To send a one-off or special email edition
* To retry an automated send that encountered a problem
## How it works
{% hint style="info" %}
Send Now can only be used for automated email campaigns that are fully set up and ready to run. Follow[ this guide](https://docs.feedotter.com/automated-newsletters/getting-started) to setup your automated campaign.
{% endhint %}
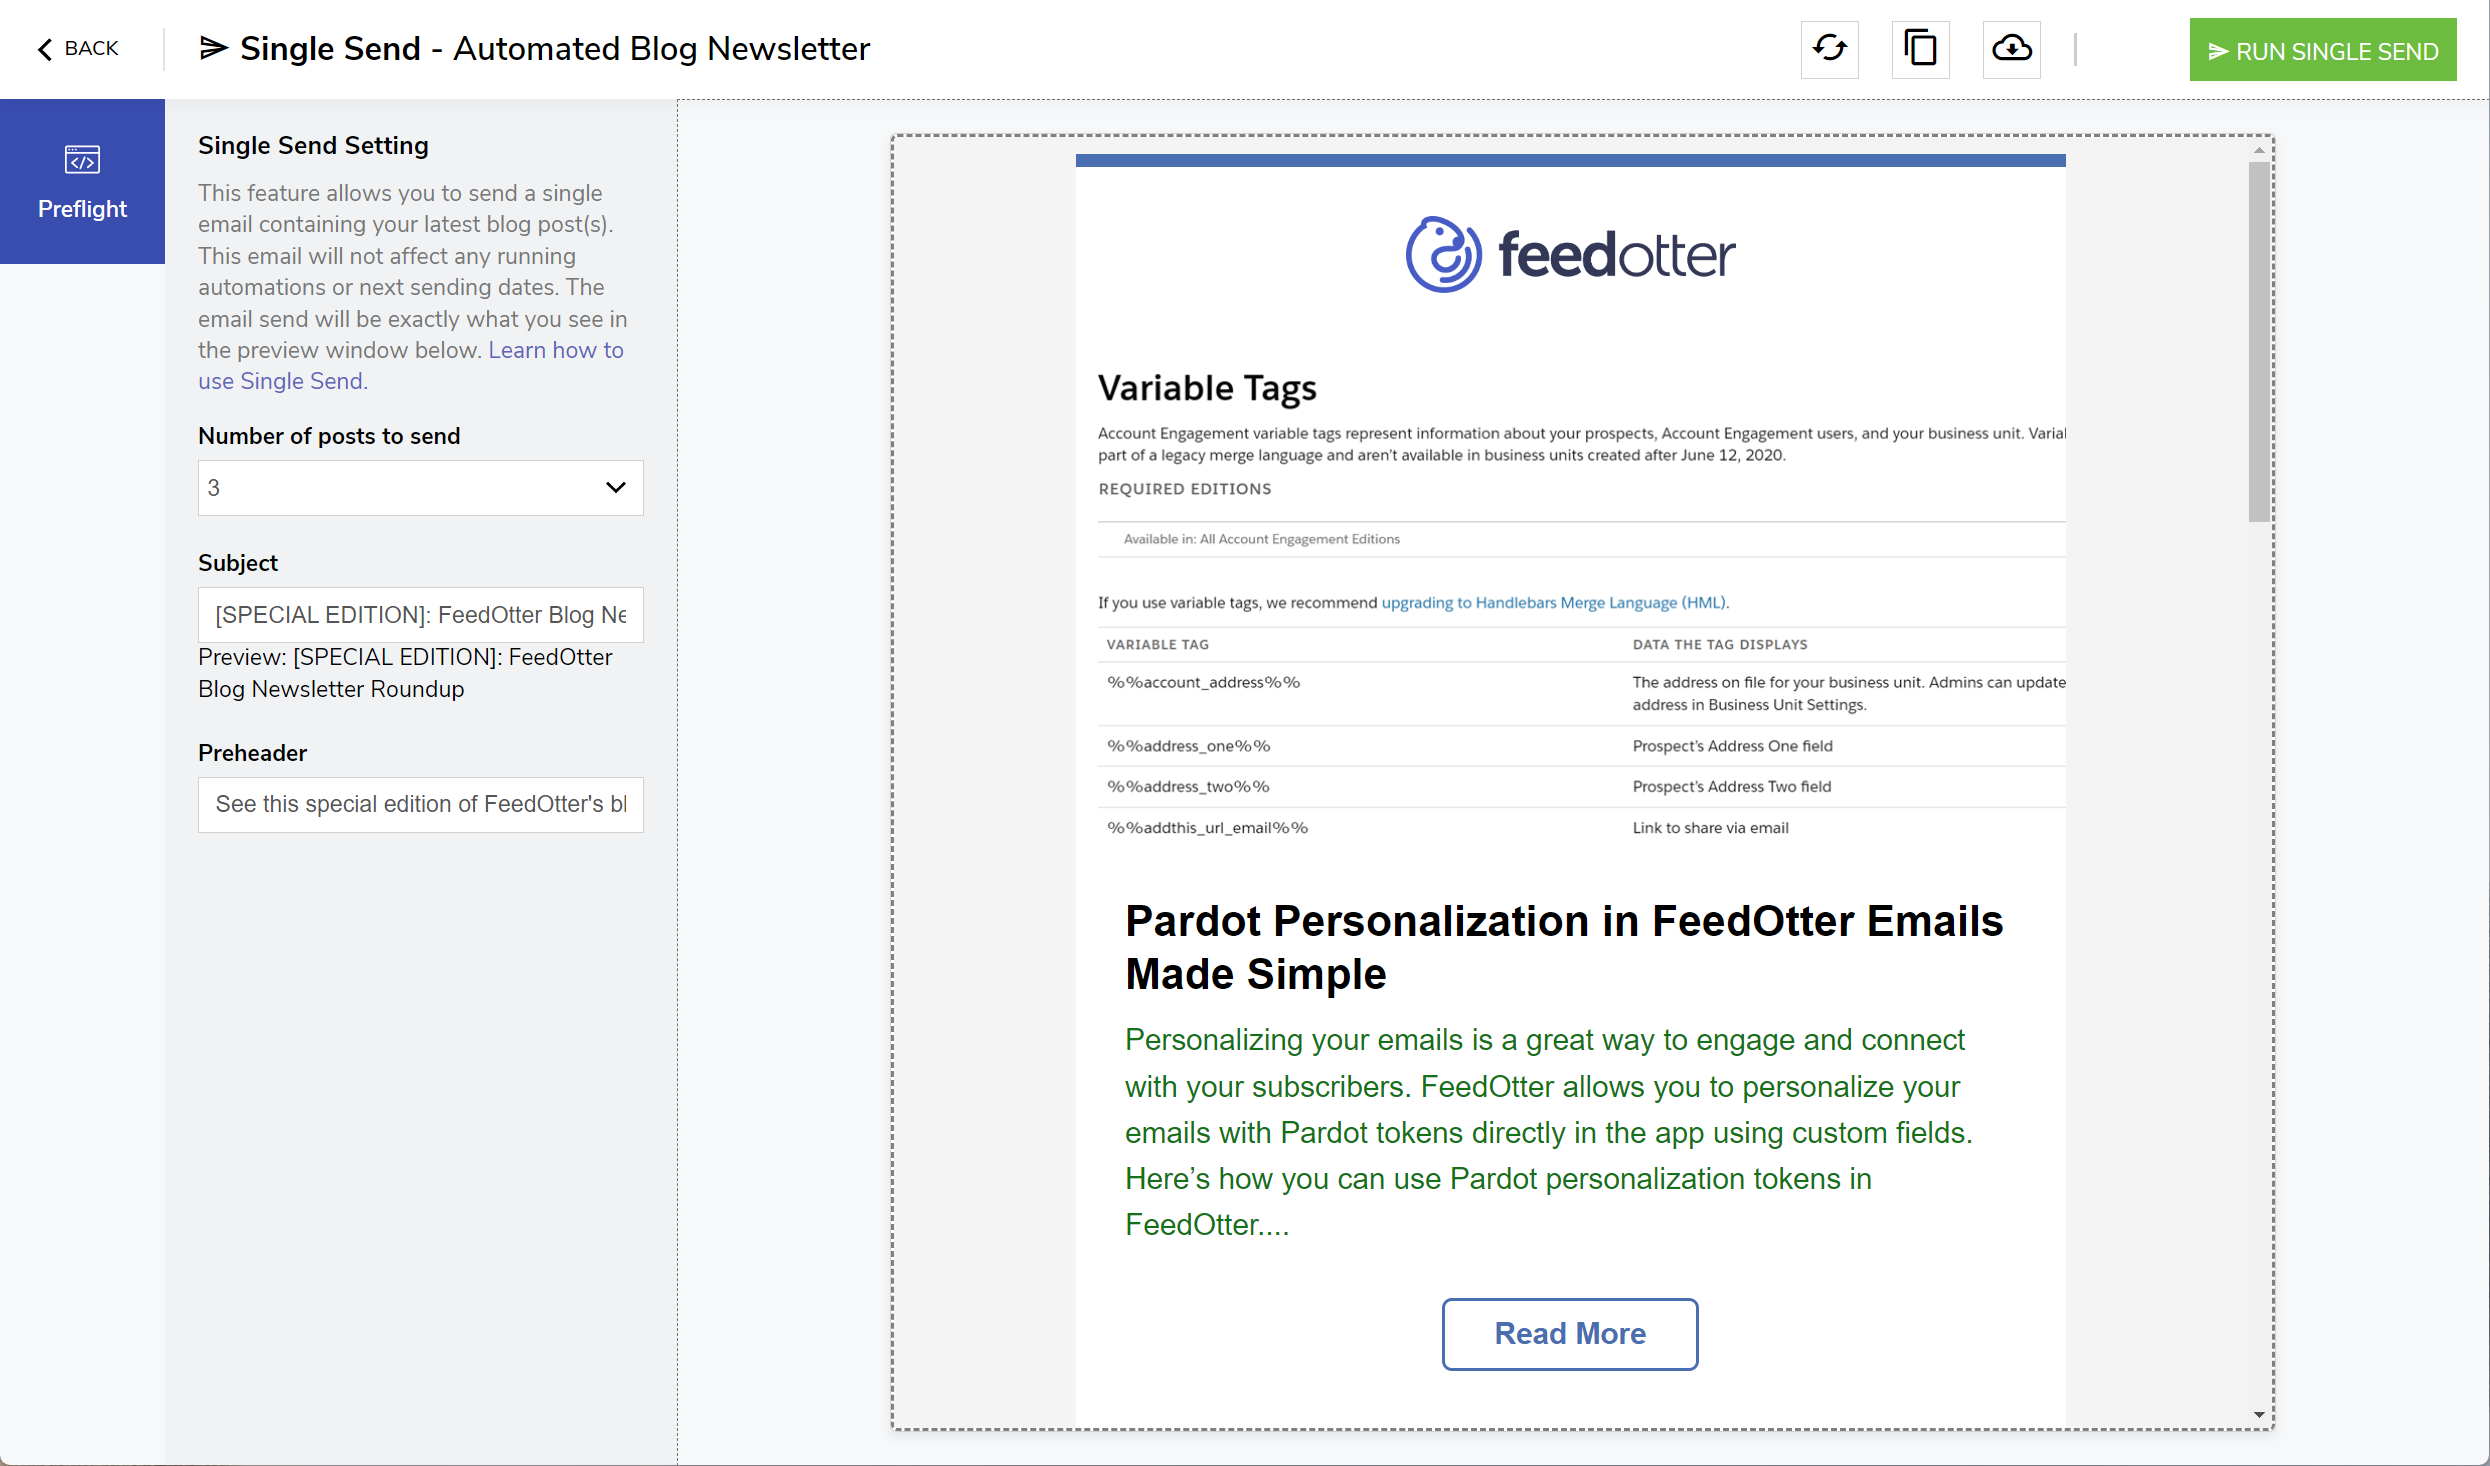
The first step is to select the **Send Now** button on your automated campaign. Nothing will send immediately, but you'll be taken to a Preflight interface to review your email and confirm you'd like to create/send an email through your ESP.
### **Preflight Interface**
On the left side of your screen, you should see a **Preflight** panel. Below, you can adjust the:
* Number of posts to send
* Subject
* Preheader
* Custom fields (if any) in your email template
{% hint style="info" %}
The preflight panel defaults to the current setup in your campaign. Any changes made here will only update the one-off send. These changes will NOT affect/update your automated campaign settings.
{% endhint %}
Once it fits your preferences, you can click the **Refresh icon** to update the email preview and ensure everything is looking exactly the way you want it to. You’ll see a preview of the exact email and content to be sent.
Preflight interface to preview your newsletter before sending.
### Sending Your Email
There are a couple options you could take from here: **Download/Copy the HTML** or **Run Single Send**.
If you choose to run a single send, an email will be sent to your ESP and will follow your scheduled campaign settings.
This means FeedOtter will use the settings configured in the **Schedule** tab of your campaign (lists, create/schedule options, etc.) to execute the single send. This may result in an actual email send to your subscriber list if this is what you have set up.
If you don't want an email to send but need the email as-is, you can select the Copy compiled HTML icon or Download HTML icon. This allows you to extract the email code and manually insert it into your ESP or any other platform as needed.
### Updating The Content Cutoff/Last Send Date
Sometimes, you may want to resend automated campaigns or perform a "forced send" using the **Send Now** feature while keeping the automated schedule intact.
After using **Send Now**, you can update the campaign's **Last Send Date** to a specific date and time of your choice.
When you restart the campaign automation, the automated schedule will resume based on this date/time.
If your automations only send "new content," the date/time you supply here will act as the cutoff for new content.
This allows you to **Send Now** and tell FeedOtter when content was last send manually.
To update this value, pay attention to the success popup **after sending a Send Now.**
1. Click the **Update Campaign Last Sent** link
2. Set the date and time that FeedOtter should remember as the cutoff for future automations.
Of course you can view your newly scheduled email in your ESP by clicking the respective green button as well.
---
# Agent Instructions: Querying This Documentation
If you need additional information that is not directly available in this page, you can query the documentation dynamically by asking a question.
Perform an HTTP GET request on the current page URL with the `ask` query parameter:
```
GET https://docs.feedotter.com/automated-newsletters/features/send-now.md?ask=
```
The question should be specific, self-contained, and written in natural language.
The response will contain a direct answer to the question and relevant excerpts and sources from the documentation.
Use this mechanism when the answer is not explicitly present in the current page, you need clarification or additional context, or you want to retrieve related documentation sections.